To improve your studio sound on a budget, start by tackling acoustics—add foam panels, bass traps, and diffusers to reduce echoes and reflections. Next, focus on your gear, choosing budget-friendly microphones and reliable audio interfaces. Then, invest in accurate monitoring with affordable studio headphones or monitors to guarantee your sound is true. Finally, enhance your mix with free or inexpensive software plugins. Keep exploring to discover more tips on creating a professional sound environment.
Key Takeaways
- Prioritize acoustic treatment to reduce reflections and improve room clarity before upgrading gear.
- Select budget-friendly microphones and interfaces that suit your recording needs early in the process.
- Optimize monitor and headphone placement for accurate sound perception to enhance mixing accuracy.
- Use free or inexpensive plugins for editing and mixing to refine recordings cost-effectively.
- Upgrade to software and advanced tools gradually after establishing solid room acoustics and reliable hardware.
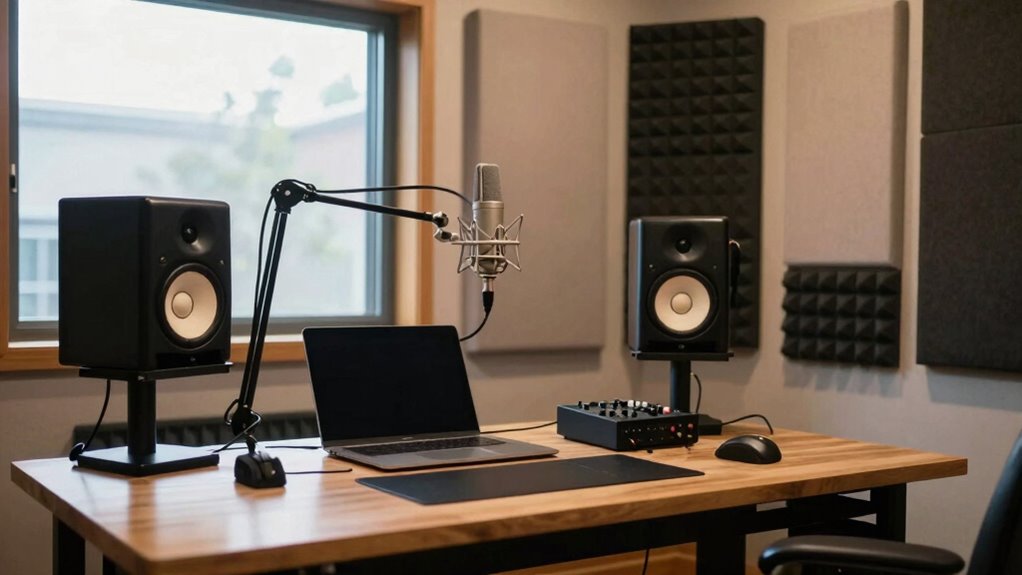
Are you wondering how to get professional-quality studio sound without breaking the bank? The good news is, you don’t need expensive equipment to make a noticeable difference. Instead, focus on a strategic order of upgrades, starting with the basics that lay a solid foundation for your recordings. The first step is addressing your room’s acoustic treatment. No matter how good your gear is, if your room produces echoes, flutter echoes, or uneven sound reflections, your recordings will suffer. Invest in budget friendly gear like foam panels, bass traps, and diffusers to control sound reflections. These don’t have to be costly; many affordable options effectively reduce unwanted reverberations. Proper acoustic treatment guarantees your space sounds clearer, making your recordings more professional and easier to mix later. Being mindful of biodiversity in your environment can also influence sound quality by creating a more natural and less reflective space. Additionally, understanding the fundamentals of acoustics can help you optimize your room’s layout for better sound control. Incorporating room dimensions and furniture placement can further enhance your acoustic treatment efforts. A good understanding of sound absorption principles can help you select the most effective materials for your space. Moreover, exploring sound diffusion techniques can help break up sound waves and reduce harsh reflections, improving overall clarity.
Start with affordable acoustic treatment to create a clear, professional sound environment for your recordings.
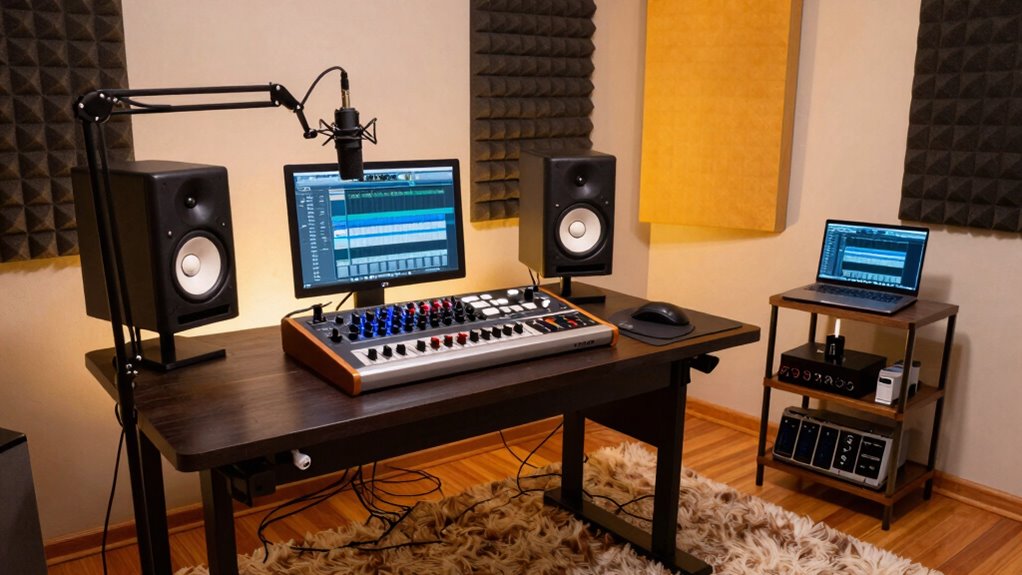
Once your room’s acoustics are improved, you can move on to the core recording equipment. A decent microphone and audio interface are essential, but you don’t need high-end models right away. Look for budget friendly gear that offers good sound quality within your price range. Focus on a versatile condenser microphone or a dynamic mic suited for your recording style. Pair it with an audio interface that provides clean preamps and reliable connectivity. This combo forms the backbone of your studio, letting you capture clear, accurate sound without overspending.
Next, consider your monitoring setup. Good monitors or studio headphones are key for accurate mixing. You don’t need the most expensive monitors to start; many affordable models deliver a flat response that reveals your recordings’ true tone. Proper placement of your monitors and headphones is essential—place them at ear level and in a balanced position to avoid coloration of the sound. With your acoustic treatment and decent monitors, you’ll get a much clearer picture of your recordings, enabling better mixing decisions.
Finally, once your room sounds good and your basic gear is in place, you can add software plugins for editing and mixing. Many free or inexpensive options are available that can enhance your recordings without a hefty investment. Focus on learning how to use EQ, compression, and reverb effectively, which can greatly improve your sound. Remember, upgrading your studio in the right order—starting with acoustic treatment, then gear, then software—maximizes your budget and guarantees each step builds on the previous one. You don’t need to spend a fortune to create professional-quality recordings; a thoughtful, phased approach will get you there.

50 Pack Sound Proof Foam Panels for Walls, 2 X 12 X 12 Inches Acoustic Foam Panels, High Density Acoustic Panels Sound Absorbing, Noise Cancelling Studio Wedges, Black (NOT INCLUDE ADHESIVE)
PROFESSIONAL SOUND ABSORBING PROPERTIES – Our acoustic foam panels are expertly designed to reduce noise pollution by absorbing…
As an affiliate, we earn on qualifying purchases.
As an affiliate, we earn on qualifying purchases.
Frequently Asked Questions
Can DIY Acoustic Treatments Be as Effective as Professional Ones?
DIY acoustic treatments can be quite effective if you carefully consider room dimensions and material choices. You can tailor treatments to your space, using affordable materials like foam, panels, and bass traps. Proper placement makes a big difference, helping to reduce echoes and improve sound clarity. While professional treatments often offer more precision, a well-planned DIY approach can markedly enhance your studio sound on a budget.
How Much Should I Budget for Acoustic Panels?
You should budget around $200 to $500 for acoustic panels, but it depends on your room dimensions and speaker placement. Larger rooms need more coverage, while strategic speaker placement can reduce the number of panels required. Start with a modest budget, then gradually add panels as you identify problem areas. Remember, properly positioned panels make a huge difference, so invest wisely to maximize your acoustic treatment’s effectiveness.
Are There Affordable Software Options for Sound Treatment?
Yes, there are affordable software options for sound treatment that can help you optimize your room. Using tools like Room EQ Wizard, you can analyze your room’s dimensions and identify problem frequencies. Combine this with soundproofing techniques like sealing gaps and adding bass traps to improve acoustics without breaking the bank. These methods let you make smarter adjustments, enhancing your studio sound on a budget.
What Are Common Mistakes When Upgrading Studio Sound on a Budget?
Ever wonder if you’re making costly mistakes? When upgrading your studio sound on a budget, avoid common pitfalls like neglecting proper soundproofing techniques or rushing into studio equipment upgrades without addressing acoustics first. Focusing solely on new gear can waste money if your room isn’t sound-treated. Instead, prioritize acoustic treatments, then upgrade your equipment gradually, ensuring each step enhances your sound quality effectively, saving you time and money.
How Long Does It Take to Notice Improvements?
You’ll typically notice improvements within days to a few weeks after addressing room dimensions and sound reflection issues. Smaller changes, like adding bass traps or adjusting speaker placement, show quick results, while larger modifications to your room’s dimensions take longer to fully realize. Be patient, as consistent adjustments help optimize sound reflection, gradually enhancing your studio’s acoustics and overall listening experience.

Audio-Technica ATH-M20x Professional Studio Monitor Headphones, Black
Advanced build quality and engineering; Designed for studio tracking and mixing
As an affiliate, we earn on qualifying purchases.
As an affiliate, we earn on qualifying purchases.
Conclusion
By following this step-by-step approach, you’ll transform your studio into a sound sanctuary without breaking the bank. Think of it as tuning a finely crafted instrument—each upgrade brings clarity and harmony. Remember, patience and strategic choices are your best friends on this journey. With each improvement, you’ll find your sound quality blooming like a well-tended garden, turning your humble space into a powerhouse of professional-grade audio.

Focusrite Scarlett Solo 3rd Gen USB Audio Interface for Guitarists, Vocalists, Podcasters or Producers to record and playback studio quality sound
Pro performance with great pre-amps – Achieve a brighter recording thanks to the high performing mic pre-amps of…
As an affiliate, we earn on qualifying purchases.
As an affiliate, we earn on qualifying purchases.

8 Pack – Bass Traps Acoustic Foam Corner, 8''x8''x12'' Black Bass Traps Corner Studio Foam, High Density and Fire-Proof Acoustic Panels Recording Studio Acoustical Treatments
Acoustic Principle- Bass Trap is a kind of sound absorbing structure specially used to absorb specific low-frequency standing…
As an affiliate, we earn on qualifying purchases.
As an affiliate, we earn on qualifying purchases.