
The most important gimbal feature for phone video is selecting the right stabilization mode to match your shooting style. Whether you need static shots, smooth follow shots, or sweeping pans, choosing the correct mode guarantees steady footage. Properly using lock, follow, or pan modes makes a huge difference in video quality. To get the best results and avoid common mistakes, understanding how to optimize your gimbal’s settings is key—there’s plenty more to explore if you keep going.
Key Takeaways
- Stabilization mode selection (lock, follow, pan) directly impacts the smoothness and cinematic quality of phone videos.
- Proper calibration and maintenance of the gimbal ensure consistent, professional-looking footage.
- Environmental awareness and technique adjustments reduce shakes caused by wind or uneven terrain.
- Balancing the phone correctly on the gimbal prevents jittery footage and extends device lifespan.
- Understanding device limitations and avoiding overloading maintains optimal stabilization performance.

ScanSnap iX1300 Compact Wireless or USB Double-Sided Color Document, Photo & Receipt Scanner with Auto Document Feeder and Manual Feeder for Mac or PC, Black
FITS SMALL SPACES AND STAYS OUT OF THE WAY. Innovative space-saving design to free up desk space, even...
As an affiliate, we earn on qualifying purchases.
What Are Gimbal Stabilization Modes?
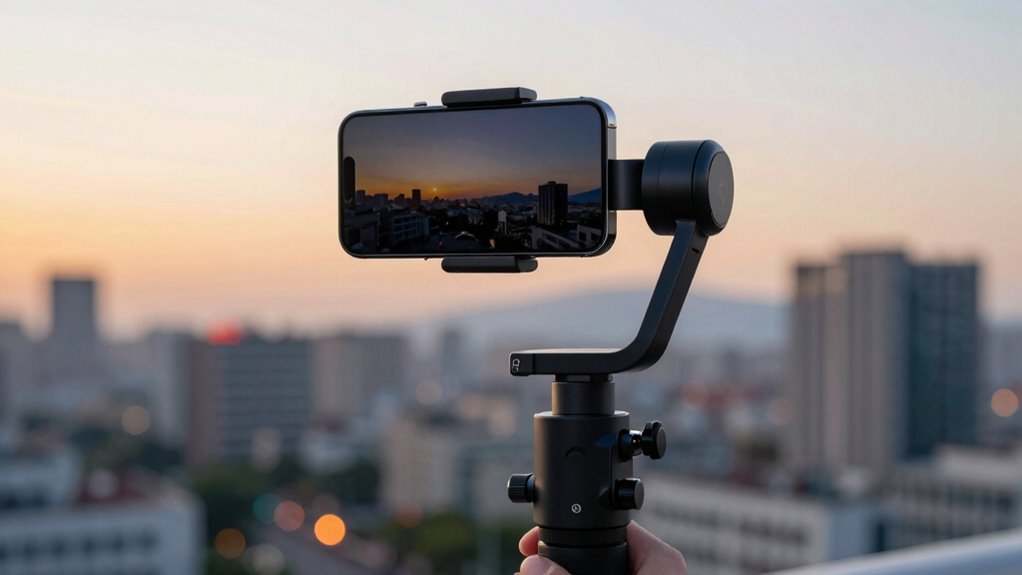
Have you ever wondered how gimbals keep your phone steady even when you’re moving around? Gimbal stabilization modes are designed to adapt to different shooting situations, giving you smooth footage regardless of your camera angles or lighting conditions. These modes control how the gimbal responds to your movements, whether you’re walking, running, or changing angles. For example, some modes lock the camera in a specific direction, ideal for steady shots, while others allow full movement, perfect for dynamic scenes. You can switch between these modes to match your environment, ensuring your videos stay stable even if lighting conditions shift or if you’re capturing fast-paced action. Understanding these modes helps you maximize stability and achieve professional-looking results effortlessly. Exploring different digital concepts can also enhance your overall content creation skills.

Epson Workforce ES-580W Wireless Color Duplex Desktop Document Scanner for Computers Including PC and Mac with 100 Sheet ADF Auto Feeder and Intuitive 4.3 in Touchscreen, Black
EFFORTLESS WIRELESS SCANNING — With a 4.3 in touchscreen and wireless connectivity this high-speed document scanner sends scans...
As an affiliate, we earn on qualifying purchases.
How to Choose the Best Stabilization Mode for Your Shooting Style
Choosing the right stabilization mode depends on your shooting style and the type of movement you expect. If you’re filming steady scenes, a lock mode might be ideal, but for dynamic action, a follow or pan mode could work better. Adjusting these settings guarantees your footage stays smooth and natural, no matter how you move. Additionally, understanding the different stabilization modes can help you select the best option for your specific needs. For optimal results, consider how camera movement techniques impact your footage and choose the mode that aligns with your desired effect. Being aware of gimbal features that enhance stabilization can also make a significant difference in your final output. Knowing how vibrations and shocks from your environment influence your stabilization system can further improve your filming experience.
Matching Modes to Styles
Selecting the right stabilization mode depends on your shooting style and the type of footage you want to capture. If you’re aiming for creative storytelling with dynamic movement, choose a mode that offers smooth, fluid shots while allowing some flexibility for natural motion. For scenes with controlled lighting techniques, a mode that emphasizes stability helps maintain clarity and focus, especially in low light. Consider how your style influences the footage—if you prefer energetic, handheld shots, a mode that minimizes jitter without sacrificing mobility is ideal. Conversely, for cinematic looks, select a mode that provides steady, professional-quality stabilization. Matching modes to your style ensures your footage communicates your vision effectively, whether it’s emphasizing mood, movement, or detail.
Adjusting for Movement
When your shot includes movement—whether you’re walking, running, or panning—the stabilization mode you pick can make or break the footage. Choosing the right mode depends on your shooting techniques and desired effect. Consider these options:
- Follow Mode – Ideal for dynamic scenes, it keeps your subject steady while allowing smooth camera movement. This mode is particularly useful when capturing fast-paced action or sports, where fluidity is key.
- Lock Mode – Best for stationary shots, it minimizes unwanted shifts, focusing on stability. It is especially effective in situations where the camera remains fixed on a single subject or scene.
- Pan Follow Mode – Perfect for sweeping shots, it stabilizes vertical movement while letting horizontal pans flow naturally. This mode is great for landscape filming or cinematic panning shots.
- All-Around Mode – Use this for versatile shots, balancing stabilization across all axes for fluid motion. Understanding the stabilization modes and how they adapt to different shooting scenarios is essential for achieving professional-quality footage. Selecting the right camera accessories and understanding these modes helps you capture professional-quality footage, regardless of movement. Silly tantrums during family photoshoots can add unexpected humor and charm to your videos, highlighting the importance of choosing the right stabilization to handle unpredictable movements.

Epson Workforce ES-400 II Color Duplex Desktop Document Scanner for Computers Including PC and Mac with Auto Document Feeder and Image Adjustment Tools
FAST DOCUMENT SCANNING — Document scanner with feeder allows you to speed through stacks with a 50-sheet Auto...
As an affiliate, we earn on qualifying purchases.
When Should You Use Lock, Follow, or Pan Modes?

Understanding when to use Lock, Follow, or Pan modes can considerably improve your phone video footage. Lock mode is perfect for static shots, keeping the camera completely steady when you want a stable, professional look. Follow mode is ideal for capturing subjects in motion, allowing the gimbal to smoothly track their movement and add dynamic energy. Pan mode is best when you want to create sweeping, cinematic shots, as it lets the gimbal rotate freely while maintaining stability. Using these modes strategically enhances your creative filming techniques and adds variety to your videos. Additionally, experimenting with different gimbal accessories can further optimize each mode’s capabilities, helping you craft more engaging and polished content. Recognizing the specific gimbal modes and their ideal use cases can help you tailor your filming approach for more compelling results. For example, understanding the gimbal’s stabilization technology can give you better control over your shots and reduce unwanted movement. Being aware of the seasonal lighting conditions can also influence your choice of mode to best adapt to changing environments. Exploring the gimbal’s compatibility with accessories can unlock new creative possibilities and improve overall stabilization.
Plustek PS186 Desktop Document Scanner, with 50-Pages Auto Document Feeder (ADF). for Windows 7/8 / 10/11 (Intel/AMD only)
Up to 255 customize favorite scan file setting with "Single Touch" , Support Windows 7/8/10
As an affiliate, we earn on qualifying purchases.
Tips for Improving Stabilization in Indoor and Outdoor Settings

Optimizing stabilization requires adapting your technique to different environments. Indoor settings often lack space and stable surfaces, so focus on steady hand movements and smooth fluidity. A stable grip can significantly reduce unintended movements during creative filming. Outdoors, wind and uneven terrain challenge your gimbal’s effectiveness. To enhance stabilization, consider these tips:
Adapting your technique to indoor and outdoor environments enhances stabilization and captures seamless footage.
- Practice your grip to reduce unintended movements during creative filming.
- Use slow, deliberate motions to keep footage smooth despite environmental distractions.
- Check your equipment maintenance regularly—clean lenses, tighten mounts, and update firmware.
- Adjust your surroundings when possible, finding stable surfaces or sheltered spots to improve shot stability.
- Incorporate proper gear to further support your stabilization efforts and protect your equipment from environmental factors.
- Remember that understanding environmental factors can help you better adapt your technique and achieve smoother footage. Additionally, being aware of outdoor conditions such as wind or uneven ground allows you to modify your approach for optimal results. Recognizing the impact of essential oils for stabilization — like lavender or peppermint, which are known for calming and refreshing effects — can also help maintain focus and steadiness during filming. Using environmental awareness techniques can further help you anticipate and mitigate potential disturbances during shooting.
Common Mistakes That Reduce Your Gimbal’s Effectiveness
One common mistake is neglecting proper calibration, which can cause your gimbal to perform poorly. Overloading the device beyond its recommended weight limits also reduces stabilization and increases wear. To get the best results, make sure you calibrate regularly and stick to the gimbal’s weight guidelines. Additionally, understanding media literacy can help you evaluate the quality of footage and avoid reliance on shaky or poorly stabilized videos. Being aware of technology limitations can also help set realistic expectations for your device’s performance. Recognizing how passive voice can weaken your writing is equally important for creating clearer, more engaging content. Paying attention to device specifications ensures you select the right gimbal for your needs and prevents unnecessary issues. Knowing the importance of dog breed characteristics can help you choose a device that suits your specific needs, especially if you’re capturing footage of active or large breeds.
Ignoring Proper Calibration
Failing to properly calibrate your gimbal can considerably diminish its stability and smoothness. Calibration importance is often underestimated, yet it’s crucial for optimal user experience. When calibration is off, your shots feel shaky and unprofessional. To avoid this, ensure you:
- Follow the calibration steps precisely — skipping details ruins stability.
- Regularly recalibrate after changes in your setup or environment.
- Use the gimbal’s calibration feature instead of manual adjustments.
- Pay attention to any warning signals or irregular movements.
- Remember that proper maintenance like cleaning your device can also improve calibration accuracy.
Neglecting proper calibration not only hampers performance but also frustrates your creative flow. It’s a simple step that significantly impacts the quality of your footage, making your videos look polished and steady. Take calibration seriously to unlock your gimbal’s full potential.
Overloading the Gimbal
Overloading your gimbal can seriously compromise its stability and smoothness, even if you think your setup is within limits. Excess weight strains the motor, leading to shaky footage and quicker battery drain. When you add too many accessories or heavy attachments, the gimbal struggles to balance properly, reducing its effectiveness. This can also harm battery life, as the motors work harder to stabilize the load. Keep accessories compatible and within the recommended weight limits to maintain peak performance. Overloading not only affects footage quality but also shortens your gimbal’s lifespan. Always check the weight capacity and avoid piling on unnecessary gear. Properly balanced, lightweight setups ensure smoother shots, longer battery life, and better accessory compatibility, helping you get the most out of your gimbal.
Testing and Adjusting Your Gimbal’s Stabilization Settings
Before you start filming, it’s crucial to test and adjust your gimbal’s stabilization settings to guarantee smooth footage. Proper tweaks ensure your shots remain steady, even during movement. When adjusting, consider these key factors:
- Battery life—Optimize settings to conserve power for longer shoots, avoiding unexpected shutdowns.
- Accessory compatibility—Ensure your accessories, like microphones or lights, don’t interfere with stabilization adjustments.
- Sensitivity levels—Fine-tune to match your movement style, reducing jitter and wobble.
- Calibration—Regularly recalibrate your gimbal to maintain peak stabilization performance.
Testing these elements helps you avoid shaky footage, extends your gear’s lifespan, and ensures your setup works seamlessly together for professional-looking videos.
Frequently Asked Questions
Can Gimbals Stabilize Videos in Low-Light Conditions?
Yes, gimbals can help stabilize videos in low-light conditions, but their effectiveness depends on sensor sensitivity and low-light stabilization features. When shooting in dim settings, a gimbal with advanced stabilization and a camera with high sensor sensitivity will produce clearer, steadier footage. Keep in mind that in very dark environments, even the best gimbal might struggle without additional tools like a lens or external light source.
How Does Weight Impact Gimbal Performance and Battery Life?
Think of a gimbal as a tightrope walker balancing delicately; weight distribution directly influences its steadiness and agility. When heavier, it strains the motor, reducing battery longevity and causing sluggish responses. Lighter gimbals, with better weight management, glide smoothly, conserving power and enhancing performance. You’ll find that ideal weight distribution lets you shoot longer, steadier videos, turning your phone into a reliable cinematic partner without draining your battery too quickly.
Are There Compatibility Issues With Different Smartphone Models?
You might face compatibility issues with different smartphone models, especially if your device isn’t listed in the gimbal’s supported models. Always check the manufacturer’s model compatibility list before purchasing. Firmware updates can also resolve compatibility problems, so keep your gimbal’s firmware current. This guarantees smooth operation and often adds new features. If your phone isn’t compatible, you may need a different gimbal or an adapter to get the best performance.
How Often Should I Calibrate My Gimbal for Optimal Stabilization?
You should calibrate your gimbal whenever you notice shaky footage or after significant impacts. Regular Gimbal calibration guarantees peak stabilization and helps maintain Battery longevity by preventing unnecessary strain on motors. It’s a good idea to calibrate monthly as part of routine maintenance. Always follow your gimbal’s instructions for calibration to keep your device performing smoothly, especially if you switch between different phone models or environments.
What Accessories Can Enhance Gimbal Performance?
Did you know that using compatible accessories can boost your gimbal’s performance by up to 30%? To enhance your gimbal, consider adding a smartphone tripod mount for stability and an external microphone for better audio. Make sure accessories are compatible with your gimbal model to avoid issues. Also, invest in extra batteries or a portable charger to manage power, so you never miss a shot due to low battery.
Conclusion
Now that you know the key gimbal features and how to optimize them, you’re ready to capture smooth, professional-looking videos—no need to be a tech whiz like Leonardo da Vinci. Just remember to pick the right mode for your shot, avoid common mistakes, and tweak your settings as needed. With a little practice, you’ll be turning your smartphone into a cinematic tool, making your videos look as epic as a scene from a Hollywood blockbuster.