To fix bad home studio videos fast, use a single, well-placed light to improve your look instantly. Choose a light with adjustable brightness and color temperature, then position it above and to the side of your face for soft, even illumination. Fine-tune the setup until your skin tones look natural, and backgrounds stay balanced. Paying attention to these tips can dramatically enhance your videos—stick around to discover how to master this simple yet powerful trick.
Key Takeaways
- Position the light at a 45-degree angle above and to the side of the subject for flattering, even illumination.
- Use a diffuser or reflector to soften harsh shadows and create a more natural, polished look.
- Match the light’s color temperature with ambient lighting to ensure consistent skin tones and background harmony.
- Adjust the light’s distance and brightness to prevent overexposure or underexposure, enhancing overall video quality.
- Regularly review footage to fine-tune positioning and settings for quick, effective improvements.

EMEET S600 4K Webcam for Streaming - Sony 1/2.55'' Sensor, PDAF Autofocus, 1080P@60FPS, 2 Noise Reduction Mics, Built-in Privacy Cover, 73° FOV, Streaming Camera for Live Commerce/Gaming/Beauty
Unmatched 4K Streaming Quality - The EMEET S600 streaming camera boasts a high-definition 4K sony 1/2.55'' sensor, delivering...
As an affiliate, we earn on qualifying purchases.
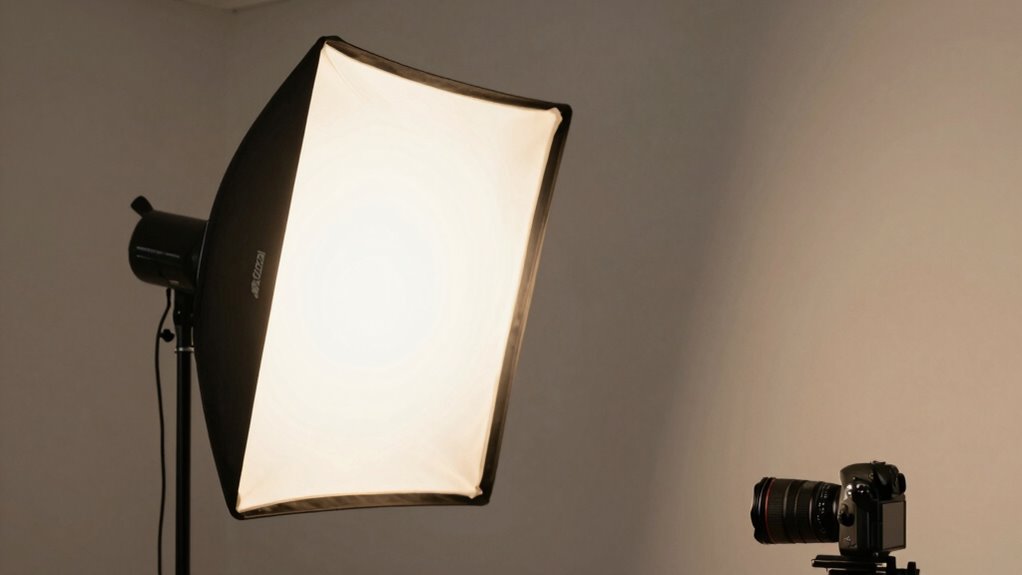
Why a Single Light Can Transform Your Home Studio Videos
Have you ever wondered how a simple light can dramatically improve your home studio videos? The answer lies in lighting aesthetics and how you regulate the light’s color temperature. A single well-placed light can create a professional look by highlighting your features and setting the right mood. Adjusting color temperature helps you match the light to your environment, whether you want warm tones for a cozy feel or cooler tones for a modern vibe. This control ensures your skin tones look natural and your background doesn’t clash. Using just one light, you can craft a visually appealing scene that captures attention and enhances your content’s quality. Additionally, incorporating natural lighting can further improve the overall aesthetic and authenticity of your recordings. When selecting lighting equipment, understanding watt-hours, capacity, and how they impact performance can help you choose the best setup for your needs. It’s a powerful, cost-effective way to upgrade your videos without complicated setups. Moreover, understanding lighting safety tips is essential to prevent accidents and ensure your setup is secure during filming. Proper knowledge about color temperature can also help you achieve consistent and flattering lighting in different recording scenarios. Being aware of lighting techniques can further refine your ability to create visually compelling videos with just a single light.

NexiGo N680E Pro 4K Webcam with Ring Light, PDAF Autofocus, 1080p 60FPS, Dual Noise-Canceling Mics, Privacy Shutter, USB Plug-and-Play for Zoom, Teams, Twitch, Google Meet
【Unmatched 4K Streaming Quality】The NexiGo N680E Pro has a Sony 1/2.5" 4K sensor for ultra-sharp, true-to-life video beyond...
As an affiliate, we earn on qualifying purchases.
How to Choose the Best Light for Your One-Light Setup
| Feature | Importance |
|---|---|
| Lighting color | Sets mood, matches environment, and enhances overall video quality. |
| Power adjustment | Controls brightness, prevents over/underexposure. |
| Portability | Easy to move and position. |
| Compatibility | Works with existing accessories. |
| Price | Fits your budget. |
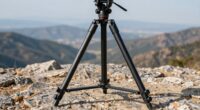
A new digital content format can influence how effectively your lighting setup appears in videos, especially when integrated with home studio equipment like cameras and tripods. Additionally, considering lighting color can help create a more professional and engaging visual presentation, making your videos stand out.

Logitech Brio 101 Full HD 1080p Webcam for Streaming and Meetings - Black
Compatible with Nintendo Switch 2’s new GameChat mode
As an affiliate, we earn on qualifying purchases.
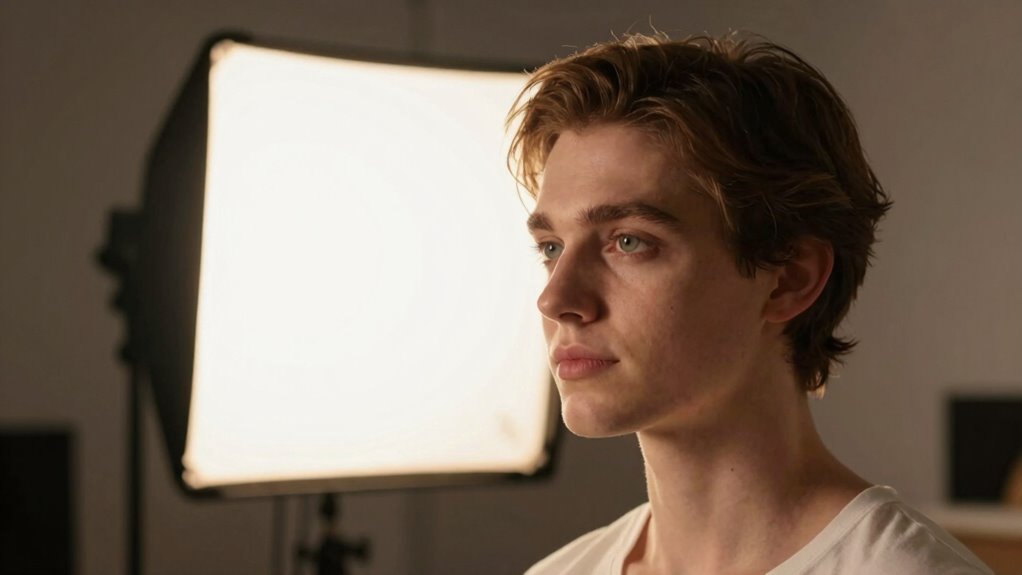
How to Position and Fine-Tune Your Light for Perfect Shots

To achieve the best results, you need to carefully position your light to illuminate your subject evenly and create the desired mood. Start by experimenting with lighting angles; placing the light slightly above and to the side of your subject often produces natural, flattering results. Adjust the angle until shadows fall softly and evenly. Fine-tune the distance to control brightness and avoid harsh shadows. Don’t forget to set the correct color temperature—whether you want a warm, inviting glow or a cooler, professional look—matching your light to your environment or camera settings. Small adjustments in angle and color temperature can make a big difference, giving your shot a polished, balanced appearance. Keep refining until your subject looks vibrant and natural.

Logitech Brio Ultra 4K HD Webcam for Streaming and Meetings - Black
Spectacular video quality: superb resolution, frame rate, color, and detail, featuring autofocus and 5x digital zoom; this Ultra...
As an affiliate, we earn on qualifying purchases.
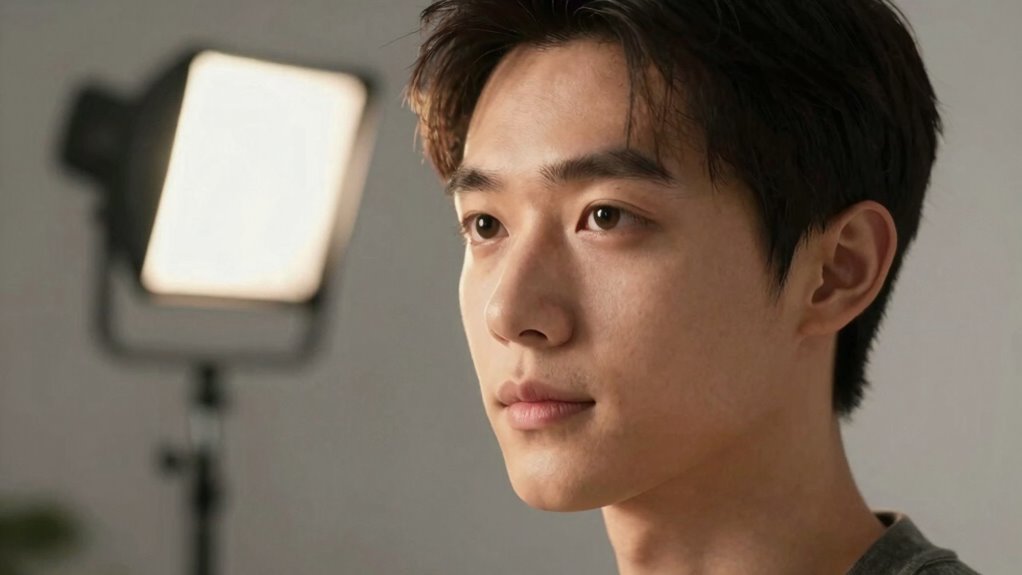
Common Mistakes to Avoid When Using a Single Light

Using a single light can simplify your setup, but it’s easy to fall into common pitfalls that undermine your shot’s quality. One mistake is neglecting background considerations, which can distract viewers or make your scene look flat. Always verify your background complements your lighting and isn’t cluttered or too dark. Don’t forget to use lighting accessories like reflectors or diffusers to control shadows and soften the light. Relying solely on the main light without adjusting for ambient or background lighting can create unbalanced footage. Avoid positioning your light too close or too far from your subject, as this can cause harsh shadows or flatness. Careful placement and thoughtful background choices are key to avoiding these common mistakes. Additionally, understanding the importance of environmental considerations can help you choose the best setup that minimizes impact and enhances your scene’s natural look. Being mindful of eco-friendly lighting options can also contribute to a more sustainable shooting environment. Incorporating energy-efficient lighting not only benefits the environment but can also reduce your overall setup costs. Moreover, considering lighting placement is essential for achieving a professional and well-balanced look.
Troubleshooting Tips and Ways to Improve Your Video Quality

Even with a well-placed single light, small issues can still impact your video quality. To troubleshoot, check your lighting equipment first—ensure it’s not flickering or casting harsh shadows. Adjust your background setup to avoid distractions or clutter that can draw attention away from you. Properly diffuse your light to create even illumination, reducing hotspots and shadows. Experiment with your light’s position to find the most flattering angle, and consider adding reflectors or bounce surfaces to soften light further. Make sure your background is simple and free of interruptions. Small tweaks, like repositioning your light or tidying your background, can dramatically improve your video. Regularly reviewing your footage helps identify issues early, so you can make quick adjustments for a professional look.
Frequently Asked Questions
What Budget Options Are Available for Effective One-Light Setups?
You can find budget-friendly one-light setups by choosing affordable lighting modifiers like softboxes or umbrellas, which diffuse light evenly. Opt for LED lights with built-in power sources or those that run on batteries to keep costs low and setup simple. Look for brands offering reliable, adjustable options without breaking the bank. This approach guarantees you get effective, professional-looking lighting without spending a fortune.
Can Natural Light Be Used as a Substitute or Supplement?
They say, “Make hay while the sun shines,” and in your case, natural supplementation can be a game-changer. You can definitely use natural light as a supplement or substitute to improve light quality in your home studio. It’s free and versatile, but keep in mind that its consistency varies. Use it to enhance your setup, especially during golden hours, but always be ready with a backup plan for overcast days or changing shadows.
How Does Room Size Affect Lighting Choices?
Room size considerably influences your lighting choices because larger rooms require more powerful or multiple light sources, while smaller spaces need less intensity. Consider room acoustics and furniture placement to optimize your setup; avoid clutter that can block light or cause uneven illumination. With a larger room, position your single light strategically to fill the space evenly, adjusting for furniture placement and reflections to achieve consistent, professional-looking video quality.
What Accessories Can Enhance a Single Light Setup?
You can enhance a single light setup with accessories like light modifiers, including softboxes or reflectors, which help control light quality and spread. Adjusting the color temperature with gels or changing the bulb can match your environment’s tone. These accessories allow you to shape and soften the light, giving your video a professional look while maintaining simplicity. They’re easy to use and make a noticeable difference in your home studio footage.
How Do Different Skin Tones Influence Lighting Placement?
In a flash, your skin tone variation determines your lighting placement. You’ll want to calibrate your lighting to complement darker or lighter skin, avoiding harsh shadows or washed-out looks. Think of it as tuning a vintage radio—adjustments matter. Use softer, more diffuse light for darker skin tones to enhance richness, and position your light slightly higher for lighter tones. Proper lighting calibration makes all tones look natural and flattering.
Conclusion
With just one well-placed light, you can elevate your home studio videos from basic to brilliant—like turning a rough sketch into a stunning painting. Focus on choosing the right light, positioning it thoughtfully, and avoiding common pitfalls. Practice makes perfect, so don’t be afraid to experiment and tweak your setup. Remember, mastering this simple setup can dramatically boost your video quality, making your content look polished and professional without the need for expensive gear.