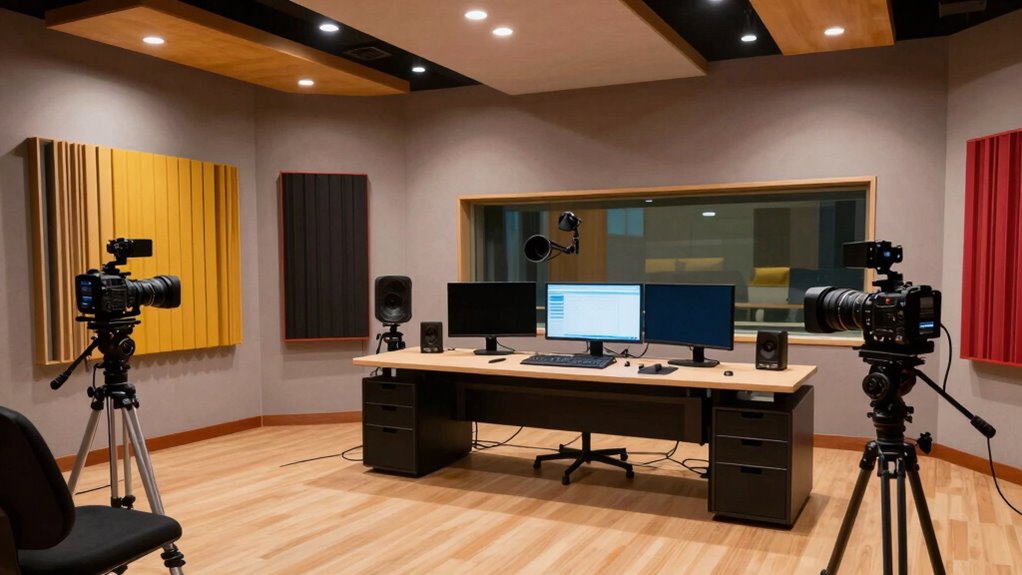
Upgrading your small studio with a multi-camera setup instantly makes the space look bigger and more professional. By positioning cameras at different angles and heights, you create depth and visual interest. Combining this with strategic lighting and clear audio enhances the overall production quality. Proper camera placement and smooth shifts make your studio appear larger and more polished. Keep exploring how to optimize your setup—you’ll find more tips to elevate your space even further.
Key Takeaways
- Using multiple camera angles creates depth and visual interest, making the studio appear larger.
- Proper lighting across all cameras ensures seamless transitions and a cohesive, spacious look.
- Strategic camera placement at varied heights and angles enhances perceived space and dimension.
- High-quality audio and consistent lighting prevent distractions, emphasizing the studio’s openness.
- Coordinating camera, lighting, and audio setups produces a polished, professional appearance that expands visual space.

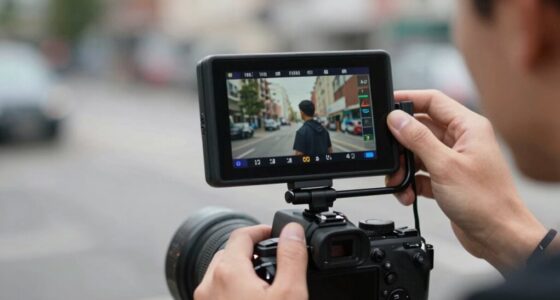
Upgrading to a multi-camera setup can substantially enhance the production quality of small studios, making your content more dynamic and engaging. When you add multiple cameras, you’re not just increasing visual interest—you’re creating a more professional and polished look that captivates your audience. But to truly maximize the impact of this upgrade, you need to focus on your lighting setup and audio improvements. Proper lighting is essential for guaranteeing each camera captures clear, vibrant images, eliminating shadows and highlighting your best features. Use softboxes, ring lights, or LED panels to evenly light your scene, and consider placing lights at different angles to add depth and dimension. When your lighting is well-balanced, switching between camera angles becomes seamless, and your viewers stay engaged without distraction.
Enhance your studio with multi-camera setups, balanced lighting, and clear audio for a professional, engaging production.
Alongside lighting, audio improvements are vital. Even the best visuals won’t hold viewers’ attention if your sound quality is subpar. Invest in a good microphone—whether a shotgun, lavalier, or condenser—so your voice comes through crisp and clear. Position your microphone close to you, but out of the shot, to reduce background noise and echo. With multiple cameras, you can also incorporate different audio sources for a richer sound experience, but guarantee all are synchronized and balanced. Clear audio paired with well-lit visuals creates a professional atmosphere that makes your studio appear larger and more sophisticated than it actually is. Ensuring consistent camera angles helps unify your overall look and enhances viewer engagement.
As you integrate multiple cameras, pay attention to how your lighting and audio work together. Consistent lighting across all angles prevents jarring shifts in brightness when switching views. Similarly, audio should be uniform across each camera feed to avoid distracting discrepancies. This coordination makes transitions smoother and the overall production more cohesive. You’ll find that with a strategic lighting setup and sound enhancements, your small studio transforms into a versatile, engaging space that feels much bigger than its physical size. Additionally, understanding camera placement techniques can greatly enhance the perception of space and depth in your recordings. Proper camera positioning is crucial for creating visual interest and emphasizing different parts of your scene. Incorporating proper camera angles can further improve this effect by giving your content a more dynamic and professional appearance.
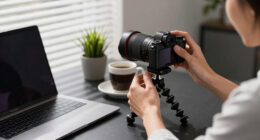
Finally, don’t overlook the importance of camera placement. Position your cameras at different heights and angles to create a sense of depth, which adds visual interest and makes your studio appear more expansive. Combine this with your improved lighting and audio, and you’ll achieve a professional-level production that elevates your content, draws viewers in, and leaves a lasting impression. This multi-camera upgrade, paired with thoughtful lighting and sound improvements, truly makes your small studio look bigger and more capable than ever before.

FlyFrost 8K Video Camera 88MP UHD WiFi Vlogging Cameras for YouTube 18X Digital Zoom IR Night Vision 3.0'' Touch Screen Camcorder with Microphone, Lens Hood, Stabilizer, Remote, Two Batteries
【2026 Latest 8K ULTRA HD & 88MP Video Camera】This video camera records videos up to 8k resolution at…
As an affiliate, we earn on qualifying purchases.
As an affiliate, we earn on qualifying purchases.
Frequently Asked Questions
How Much Does the Multi-Camera Upgrade Typically Cost?
The cost estimation for a multi-camera upgrade varies based on your studio’s needs, but generally, you can expect to spend between $10,000 and $50,000. To stay within budget planning, consider factors like camera quality, accessories, and installation. You’ll want to compare different packages and prioritize essential features. This way, you guarantee your investment enhances your studio’s look without overspending.
What Technical Skills Are Needed for Installation?
You’ll need some technical skills for installation, including camera calibration to guarantee all cameras work seamlessly together. Understanding cable management is vital to keep everything organized and prevent signal interference. Basic knowledge of audio-visual equipment, familiarity with connectors, and troubleshooting skills help you set up and fine-tune the system effectively. If you’re comfortable with these tasks, you can confidently install the upgrade and achieve professional results.
Can Existing Equipment Be Integrated Into the New Setup?
Sure, your old equipment can usually be integrated, but don’t expect a seamless dance. Equipment compatibility and integration challenges often turn into a puzzle—each piece needing the right connector or setting. While it’s tempting to reuse what you have, be prepared for some troubleshooting and perhaps extra adapters. The irony? Your vintage gear might slow down the upgrade more than you’d like, but with patience, it’ll all come together.
How Long Does the Upgrade Process Usually Take?
The upgrade process typically takes about one to two weeks, depending on your studio’s size and existing equipment. During this time, you’ll see improvements in studio acoustics and lighting enhancements, which help create a more professional environment. You’ll want to plan for some downtime, but the result will be a more versatile, visually appealing setup that makes your small studio look much bigger and more polished.
What Are Common Challenges During the Upgrade?
You might find that common challenges during the upgrade include aligning the lighting setup and ensuring smooth audio synchronization. It’s a bit of a tightrope walk, as even small missteps can throw off the entire production. You’ll need to carefully plan your wiring and calibration to avoid delays. Troubleshooting tech glitches quickly is essential, so testing everything beforehand helps keep your upgrade on track and your studio looking professional.

Torjim Softbox Photography Lighting Kit, 16'' x 16'' Professional Softbox Lighting Kit with 85W 3000-7500K LED Bulbs, Studio Lights for Photography/Video Recording/Live Streaming/Portraits Shooting
【Illuminate Your Creativity】 Torjim softbox lighting kit is made of high-quality PET fabric and a foldable nylon cover,…
As an affiliate, we earn on qualifying purchases.
As an affiliate, we earn on qualifying purchases.
Conclusion
With this multi-camera upgrade, your small studio transforms into a vibrant stage, bursting with depth and dimension. Imagine viewers feeling immersed in your content, as if they’re stepping into a larger, more dynamic space. Every shot becomes a brushstroke on a canvas, painting a lively scene that captivates and engages. You’re not just upgrading equipment—you’re opening the door to endless creative possibilities, turning your modest setup into a powerful, cinematic experience that draws people in and keeps them watching.

FIFINE USB/XLR Dynamic Microphone for Podcast Recording, PC Computer Gaming Streaming Mic with RGB Light, Mute Button, Headphones Jack, Desktop Stand, Vocal Mic for Singing YouTube-AmpliGame AM8
[Natural Audio Clarity] Operated with frequency response of 50Hz-16KHz, the podcasting XLR mic delivers balanced audio range, likely…
As an affiliate, we earn on qualifying purchases.
As an affiliate, we earn on qualifying purchases.

71" Camera Tripod, Versatile Cell Phone Tripod with Wireless Remote Phone Holder and Carry Bag, Lightweight Portable Camera Tripod Stand Compatible with Smartphone Cameras, Max Load 6.6 lbs
【Lightweight and Portable Tripod】Jishane camera tripod is made of excellent quality aluminum alloy, the solid triangular frame and…
As an affiliate, we earn on qualifying purchases.
As an affiliate, we earn on qualifying purchases.