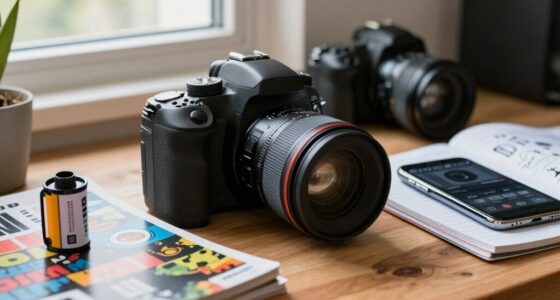

The biggest mistake that makes even good cameras look cheap is poor lighting. When you rely on harsh, uneven, or unbalanced light, your photos lose detail, look flat, and can seem low quality. Overexposure, underexposure, or bad shadows wash out colors and hide important features. If you want to elevate your photos’ professional look, mastering proper lighting techniques is key. Keep exploring to discover simple ways to fix bad lighting and improve your images instantly.
Key Takeaways
- Using harsh, direct lighting creates unflattering shadows and glare, making photos look cheap and unprofessional.
- Overhead or undiffused lights cause unappealing shadows and unnatural color tones.
- Relying solely on natural light without proper control results in flat, dull images.
- Ignoring light direction leads to unbalanced images with lack of depth and dimension.
- Not diffusing or bouncing light produces flat, unappealing photos that diminish perceived quality.

NEEWER 2 in 1 Teleprompter 11 Inch with Monitor for Windows MacOS, Supports Screen Mirroring, Portable Prompter for Camera Mobile Phone Webcam for YouTube Twitch Live Streaming Conference, X11
- Easy USB-C connection: Connect directly to USB-C computers
- Supports HDMI/USB-C splitter: Requires driver installation for HDMI/USB-C
- Compatible lenses: Supports lenses up to 72mm thread, 35-200mm focal length
As an affiliate, we earn on qualifying purchases.
How Does Lighting Impact Photo Quality?
How Does Lighting Impact Photo Quality?
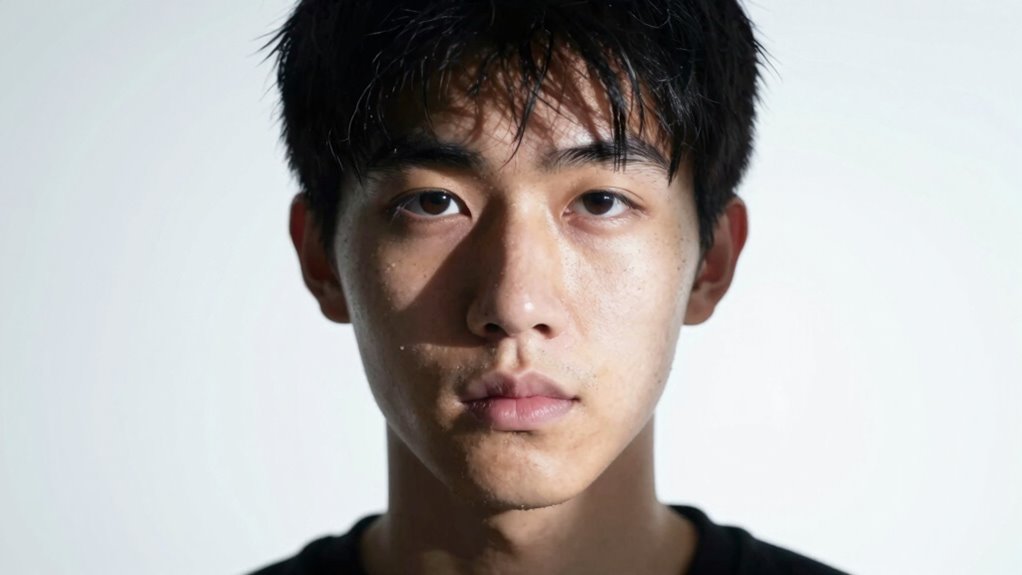
Have you ever noticed how a simple change in lighting can completely transform a photo? Lighting plays a vital role in photo quality, shaping the mood and highlighting details. Natural lighting, like sunlight, offers soft, even illumination that enhances colors and textures naturally. It’s ideal for capturing true-to-life images without harsh shadows. On the other hand, artificial illumination gives you control, allowing you to craft specific effects or brighten a scene in low light. Proper use of both types of lighting guarantees your photos look polished and professional. Poor lighting, however, can make even the best camera equipment appear cheap by creating unflattering shadows or washed-out colors. Additionally, understanding the impact of lighting on image clarity can help you avoid common pitfalls and optimize your setup. Being aware of astrological influences can even subtly affect your mood and confidence, which may influence how you approach photography sessions. Recognizing the importance of backyard transformation essentials, such as outdoor lighting options, can further enhance your outdoor photography environment. Incorporating knowledge about electric bikes and power sources can also inspire creative lighting setups, especially when working outdoors or in off-grid locations. Using the right lighting techniques can significantly improve your photos and help you achieve a professional look.

Elgato Prompter, Teleprompter with Built-in Screen
- Built-in Display: No extra devices needed
- Drag-and-Drop Setup: Easily move windows or apps
- Multipurpose Use: Read chat or scripts
As an affiliate, we earn on qualifying purchases.
What Are the Most Common Lighting Mistakes Photographers Make?
One common mistake is overusing harsh lighting, which can create unflattering shadows and glare. Ignoring the direction of light often results in flat or awkward-looking photos. Paying attention to these details can considerably improve your images’ quality. Additionally, understanding how different content formats influence lighting choices can help you adapt your technique to various shooting scenarios. Using essential DIY tools such as reflectors or diffusers can also help you control and soften light effectively. Being aware of reliance on cloud services can remind you to have backup plans for your equipment and data. Recognizing the importance of lighting quality can further enhance your photography outcomes. Considering natural light conditions can also make a significant difference in achieving professional-looking results.
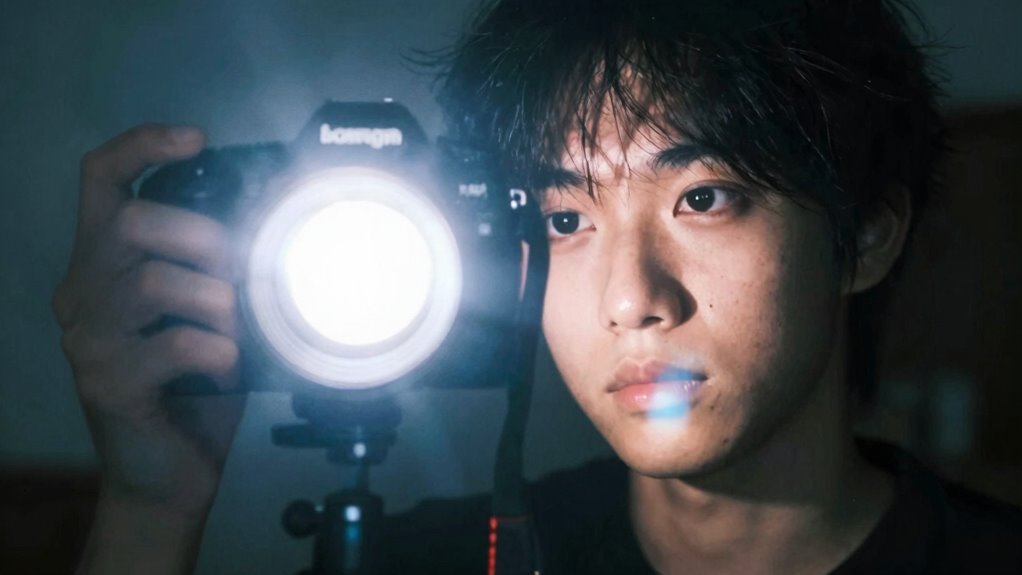
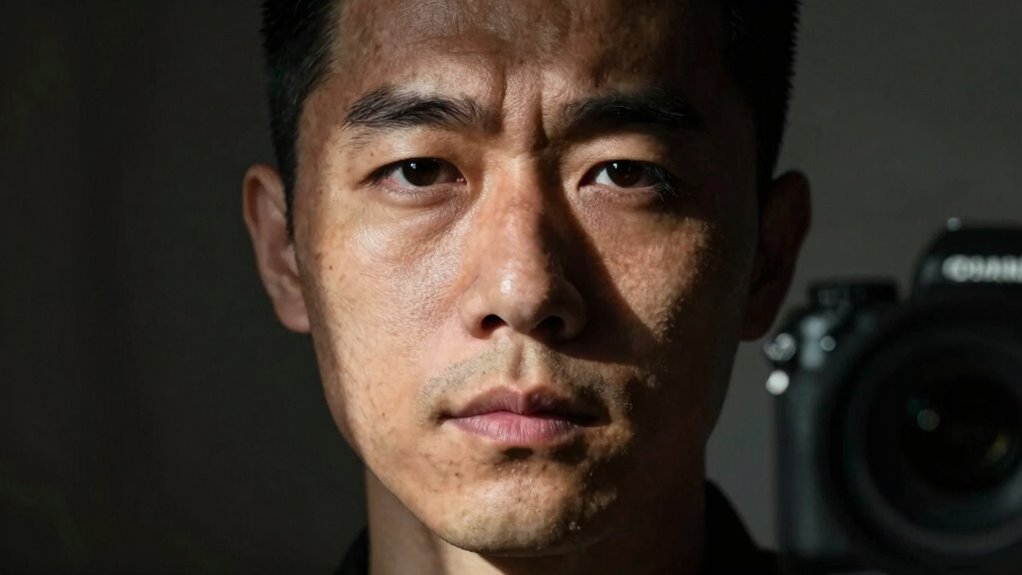
Overusing Harsh Lighting
Overusing harsh lighting is one of the most common mistakes photographers make, and it can instantly make your images look cheap or unprofessional. When you rely too heavily on bright, direct light, harsh shadows often dominate your photos, detracting from the subject and creating an unbalanced look. This overuse results in uneven illumination, where some areas are overly bright while others fall into darkness, reducing detail and clarity. Instead, aim for softer lighting or diffuse your light source to minimize these issues. By controlling your lighting and avoiding excessive harshness, you’ll produce images with more natural, pleasing tones. Remember, lighting control is essential to achieving a polished and professional appearance. Proper indoor lighting techniques can also help maintain consistent image quality regardless of the environment.
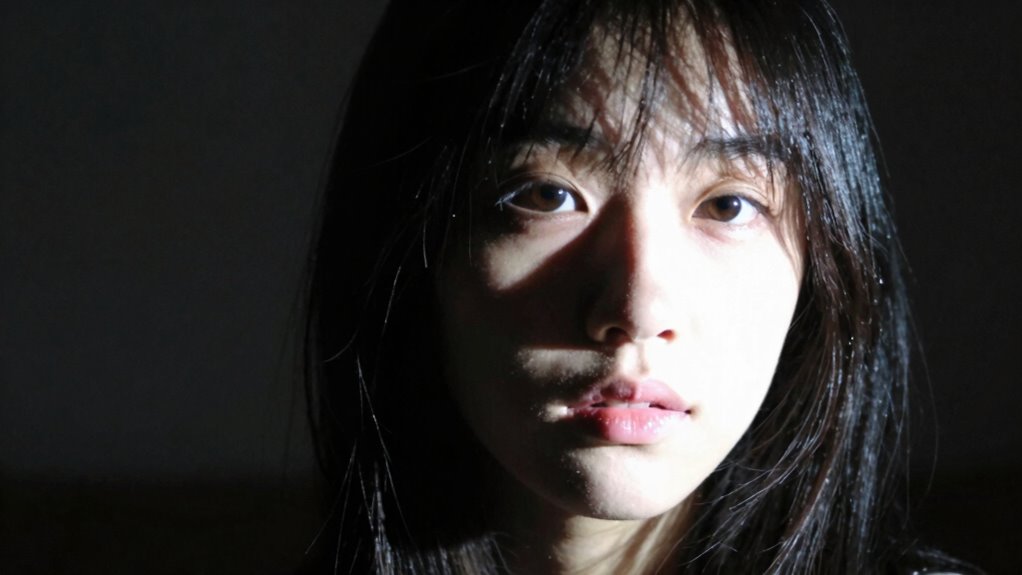
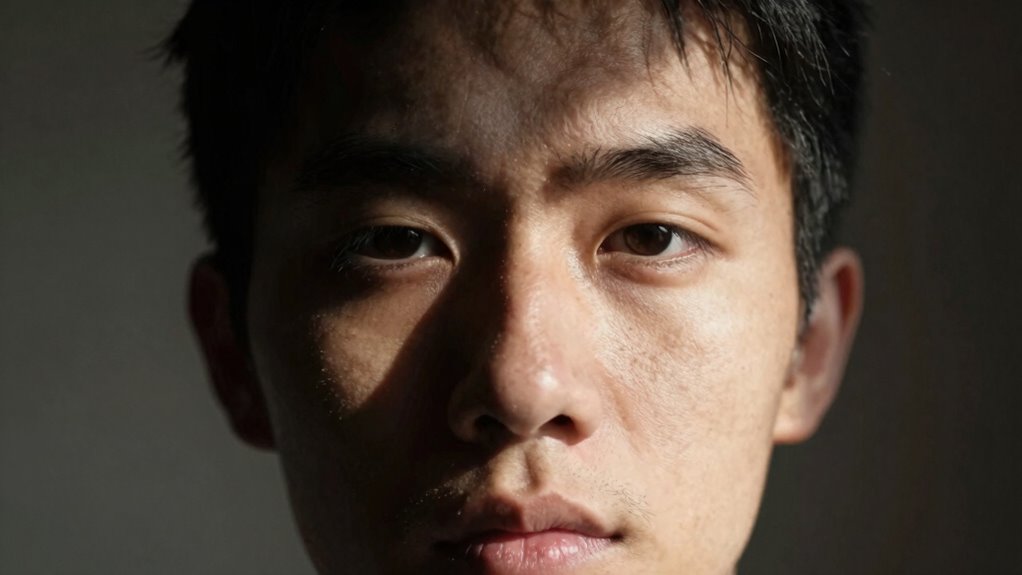
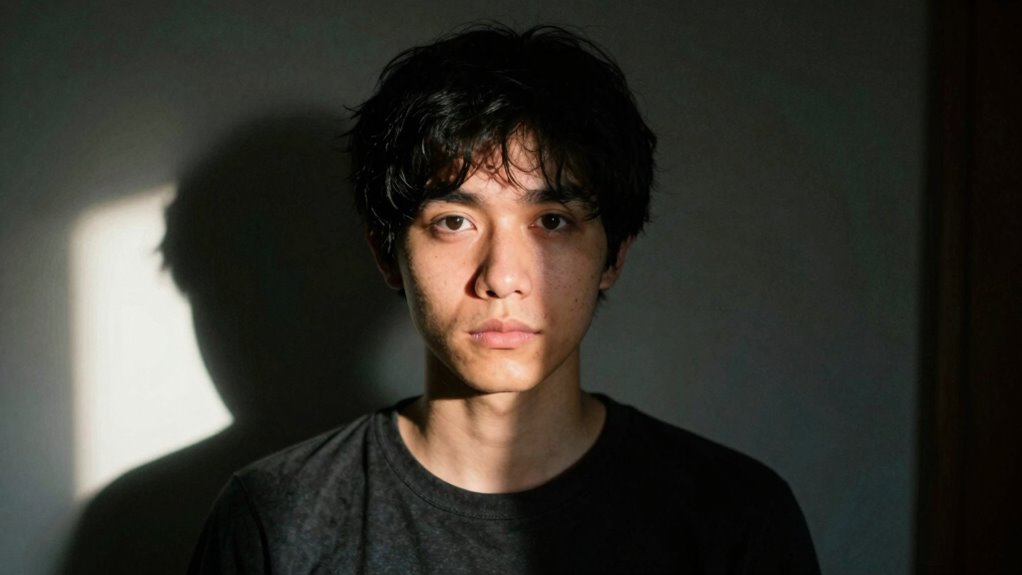
Ignoring Light Direction
Ignoring light direction is a common mistake that can dramatically weaken your photos. When you don’t consider how light hits your subject, shadow placement becomes unpredictable, and images may look flat or uninteresting. The angle of light influences depth and texture, so think about whether you want shadows to fall on one side or spread evenly. Proper light direction can highlight features or create mood, making your photos more compelling.
| Light Direction | Shadow Placement |
|---|---|
| From the side | Creates strong, defined shadows |
| From above | Shadows fall downward, flattening features |
| Front lighting | Minimized shadows, flat look |
| Backlighting | Silhouettes, dramatic effects |

NEEWER Basics X12B Aluminum Alloy Teleprompter 12" for iPad Tablet DSLR Camera, Bluetooth, No Assembly, Remote & App Control, Compatible with iOS Android, Black, for Streaming
- Economical and Practical Design: Focuses on essential functions without extras
- No Assembly Required: Easy to set up and use
- Lightweight Aluminum Construction: Durable yet easy to handle
As an affiliate, we earn on qualifying purchases.
How Do Overexposure and Underexposure Spoil Your Photos?

Have you ever looked at a photo and wondered why certain details are lost or why the image looks flat? Overexposure and underexposure can ruin your shot by washing out colors or plunging areas into darkness. Overexposure causes parts of your photo to lose detail, reducing color contrast and making the image appear dull. Underexposure, on the other hand, hides details in shadows, creating a muddy or grainy look. Both issues can lead to unwanted lens flare or glare that distracts from the main subject. To avoid this, you need to balance the light properly.
- Excessive brightness diminishes color contrast, making images look flat.
- Shadows become too deep, hiding important details.
- Proper exposure preserves vibrant colors and sharpness.

Logitech Brio 101 Full HD 1080p Webcam for Streaming and Meetings - Black
- Compatibility with Nintendo Switch 2: Supports GameChat mode
- Auto-Light Balance: Boosts brightness up to 50%
- Privacy Cover: Built-in slide for privacy
As an affiliate, we earn on qualifying purchases.
Why Is Light Direction and Shadow Placement So Important?
Ever wonder why some photos just pop, while others feel flat or confusing? The key lies in light direction and shadow placement. Light angles shape how your subject appears, highlighting features or creating unflattering distortions. Properly positioned light produces natural, appealing shadows that add depth and dimension. Shadow depth is essential—too deep, and your photo can seem dark or harsh; too shallow, and it loses contrast and interest. When you control light angles, you guide the viewer’s eye and emphasize your subject’s best qualities. Thoughtful shadow placement enhances texture and form, making your photos look professional instead of cheap. Understanding lighting techniques helps you optimize lighting setups for better results. Mastering these elements allows you to craft images with a sense of realism and visual balance, elevating even simple scenes into enthralling shots. Recognizing the impact of photo composition further enhances your ability to create compelling images. Additionally, considering water-based lighting effects can introduce unique reflections and highlights that enrich your photographs. For example, choosing the right light direction can dramatically improve the overall quality of your images.
How Do Color Temperature and White Balance Affect Your Shots?

Color temperature and white balance directly influence how colors appear in your photos, and getting them right is vital for true-to-life images. If these settings are off, your photos can look unnatural or dull. Proper white balance guarantees accurate color matching, so skin tones and objects look natural under different lighting conditions. Adjusting the white balance helps you avoid color casts that distort the scene’s true appearance. When you choose the right white balance, your camera compensates for the light’s warmth or coolness. This results in images that are consistent and realistic. Keep in mind, small adjustments can make a big difference. It’s about aligning the camera’s perception with what your eyes see, ensuring vibrant, authentic shots every time. Recognizing early breast cancer symptoms can also be crucial for timely detection and treatment. Additionally, understanding how filtration efficiency impacts your vacuum’s ability to trap allergens can be compared to white balance’s role in maintaining color accuracy in photography. Properly calibrated settings help prevent color casts from ruining your images, similar to how effective filters in vacuum cleaners improve air quality. Fine-tuning these settings ensures that your photos truly reflect the scene’s natural beauty, much like how understanding white balance enhances overall image quality. Paying attention to lighting conditions can further improve your results by helping you select the appropriate white balance preset or manual setting.
What Are Simple Lighting Techniques to Improve Your Photos Instantly?
Improving your photos instantly often comes down to mastering simple lighting techniques that anyone can apply. Start by making the most of natural light, such as shooting during golden hour or near windows, to create soft, flattering illumination. When natural light isn’t available, use artificial lighting thoughtfully—avoid harsh overhead lights and opt for diffused sources like lamps with shades or softboxes. Position your light source at a 45-degree angle to add depth and avoid flat, uninteresting images. You can also bounce light off walls or reflectors to fill shadows and create a more balanced look. Additionally, incorporating sound healing science into your environment can influence the mood and atmosphere of your photos, subtly enhancing their emotional impact. Using lighting techniques effectively can make a significant difference in the overall quality of your images. Incorporating Balinese decor masks into your space can add unique visual interest and influence the mood of your photos. These quick adjustments can dramatically elevate your photos, making them look more professional without expensive equipment or complex setups.
How Can You Fix Poor Lighting to Make Your Photos Look Professional?
When your photos are plagued by poor lighting, it’s time to take control and make adjustments that elevate their quality. Start by maximizing natural light—shoot near windows or outdoors during golden hour for soft, flattering illumination. Use lighting accessories like reflectors or diffusers to bounce light and reduce harsh shadows. If natural light isn’t enough, consider portable artificial lights to add warmth or fill shadows. Proper lighting can transform a dull image into a professional-looking shot. Remember, small tweaks make a big difference:
- Embrace natural light to create a natural, appealing look
- Use lighting accessories to control shadows and highlights
- Invest in affordable lighting gear for consistent results
Frequently Asked Questions
Can Natural Light Be as Effective as Studio Lighting?
Yes, natural light can be just as effective as studio lighting if you understand natural contrast and daylight balance. When you position yourself during the golden hour or avoid harsh midday sun, you’ll achieve soft, flattering light that enhances your subject. Adjust your camera settings to match the natural contrast, and use reflectors or diffusers to control shadows. With proper technique, natural light can create stunning, professional-looking photos.
How Does Lighting Influence the Mood of a Photograph?
Lighting deeply influences the mood of your photograph. Shadow contrast can evoke drama or mystery, while softer shadows create calmness. Color temperature also plays a role: warm tones foster intimacy, while cooler tones evoke serenity or coldness. You might think lighting is just technical, but it actively shapes emotion. Experimenting with shadow contrast and color temperature can turn a simple shot into a powerful, mood-driven image that resonates with viewers.
What Equipment Is Essential for Proper Lighting Setup?
You need essential equipment like lighting accessories, such as diffusers and reflectors, to control light quality. A good understanding of color temperature helps you match light sources for natural-looking photos. Invest in adjustable lights or strobes, and consider gels or filters for color correction. Proper setup involves manipulating these tools to create balanced, flattering light that enhances your subject and sets the right mood.
How Do Weather Conditions Affect Outdoor Lighting Quality?
Think of weather as nature’s filter for your outdoor scene. Cloud cover acts like a soft diffuser, reducing harsh shadows and creating even, gentle light. Atmospheric haze, however, can obscure details and wash out colors, like a foggy veil dulling a vibrant painting. You need to adjust your camera settings accordingly, embracing or compensating for these conditions to maintain the quality of your outdoor lighting.
Is Post-Processing Necessary to Correct Lighting Issues?
Post-processing isn’t always necessary to fix lighting issues, but it can help improve your photos. Adjusting color temperature guarantees accurate tones, especially when mixed lighting causes color casts. Light diffusion can soften harsh shadows and reduce glare. If your camera struggles with challenging conditions, editing can enhance the overall look. However, aiming for proper lighting during shooting minimizes the need for extensive post-processing, saving you time and maintaining natural results.
Conclusion
So, next time you think lighting doesn’t matter, remember it’s the secret sauce that turns a good shot into a stunning one—or makes even the best cameras look cheap. Ironically, mastering simple lighting tricks is often all it takes to elevate your photos from amateurish to professional. Don’t let bad light ruin your efforts—embrace the power of good lighting and watch your images transform before your eyes. After all, isn’t it funny how the right light makes everything better?