
You can considerably improve your home studio’s sound quality with budget-friendly, DIY solutions. Use household items like thick blankets, carpets, egg cartons, or cushions to absorb echoes and reduce reflections. Place soundproof curtains across large wall sections, hang bass traps in corners, and scatter soft textiles throughout your space. These simple steps can make a big difference without costly equipment. If you want to learn more about effective, low-cost ways to optimize your studio acoustics, keep exploring potential solutions.
Key Takeaways
- Use household textiles like blankets and carpets to absorb sound and reduce echo at minimal cost.
- Hang soundproof curtains across large walls and windows to block reflections and noise leaks affordably.
- Place DIY bass traps and foam panels in corners using inexpensive materials like egg cartons or remnant foam.
- Arrange soft furnishings, rugs, and cushions strategically to dampen reflections without expensive acoustic panels.
- Experiment with placement and layering of household items to optimize sound quality cost-effectively.

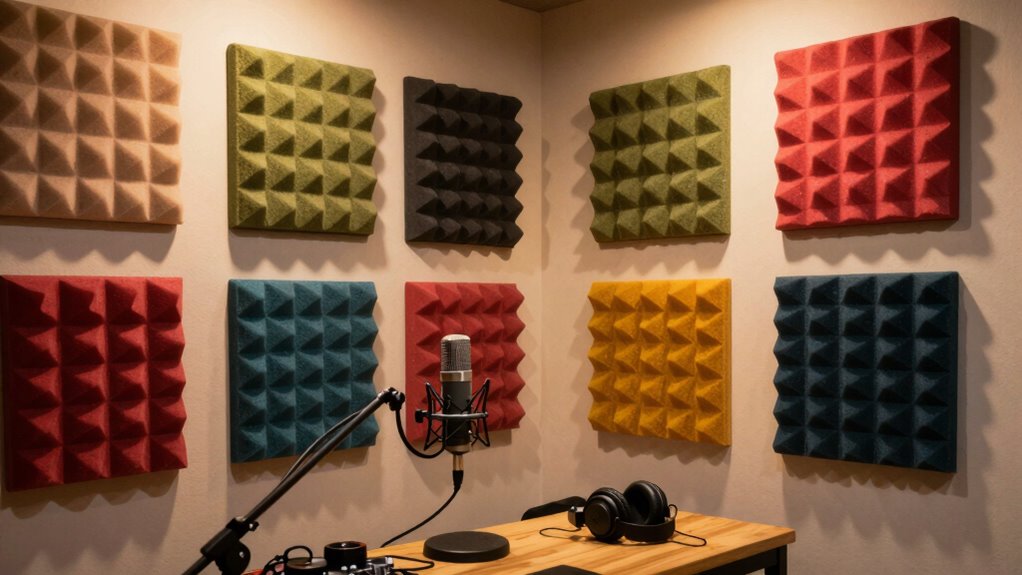
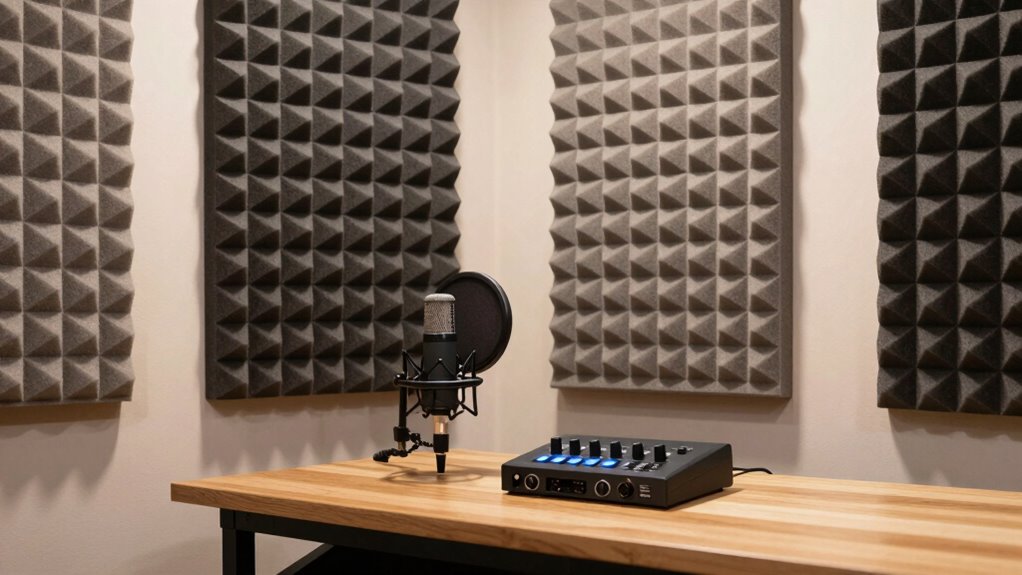
24 Pack Black 12 x 12 x 2 Inches Pyramid Designed Acoustic Foam Panels, Sound Proof Foam Panels for Walls, High Density and Flame-Retardant Acoustic Panels, Sound Panels for Recording and Home Studio
Exceptional Sound Absorption:These pyramid acoustic panels are engineered to effectively absorb sound waves, reducing echo and reverberation. With…
As an affiliate, we earn on qualifying purchases.
As an affiliate, we earn on qualifying purchases.
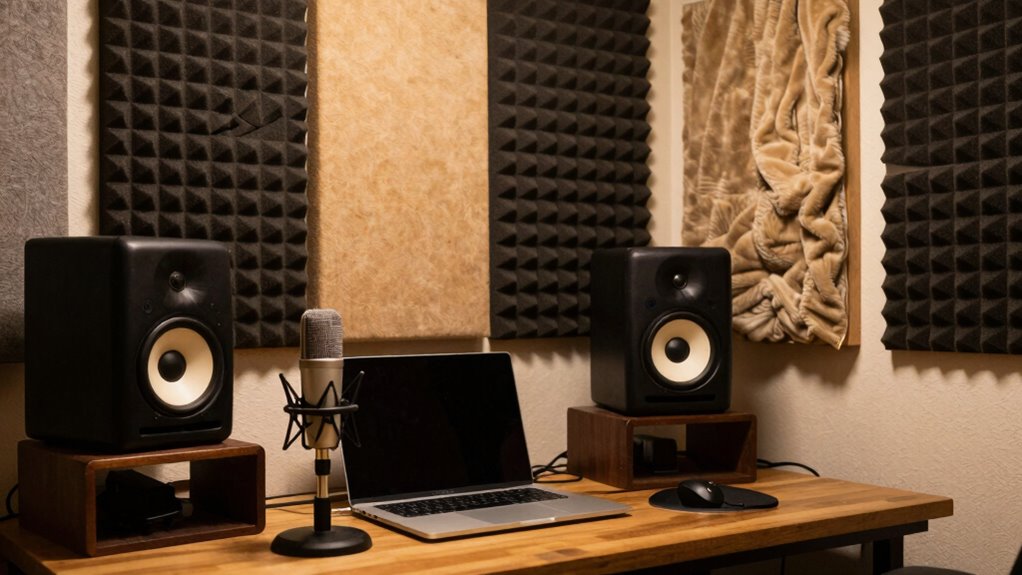
What Are the Biggest Sound Issues in Home Studios?
Many home studios struggle with sound issues because they often lack proper acoustic treatment and space planning. Common problems include unwanted noise leaks, echo, and poor sound clarity. To tackle these, you should focus on effective soundproofing techniques, like sealing gaps and adding mass to walls, to prevent sound from escaping or entering. Upgrading your equipment can also help improve sound quality, such as investing in better microphones and monitors that accurately capture your audio. Poor room acoustics often cause reflections and reverb, which distort your sound. Addressing these issues with strategic placement of bass traps and diffusers can make a significant difference. Additionally, consulting store return policies and hours can help you exchange or return equipment if it doesn’t meet your needs. Prioritizing soundproofing techniques and equipment upgrades creates a solid foundation for cleaner, more professional recordings in your home studio. Incorporating room acoustic treatment like panels and diffusers can further enhance sound quality by controlling reflections and reverberation. Understanding room acoustics can help you design a space that minimizes unwanted sound issues from the start, and choosing the right vacuums for cleaning your studio space can help maintain a clutter-free environment that promotes better sound quality. Moreover, exploring alternative venues or creative setups can sometimes provide more controlled environments for optimal sound.

VEVOR 2 Pcs Sound Dampening Blankets, Soundproof Curtains with 96 x 80 in, Soundproof Blanket with Grommets, Studio Grommeted Blanket, for Window, Door, Light Blocker, Music Recording, Black
Sound Absorption & Noise Reduction: Made with a polyester woven surface and recycled cotton filling, this 3-layer physical…
As an affiliate, we earn on qualifying purchases.
As an affiliate, we earn on qualifying purchases.
How DIY Solutions Can Improve Your Studio’s Sound Quality
You can substantially enhance your studio’s sound quality with simple DIY solutions that don’t require expensive equipment. By understanding basic music theory, you can better position your recordings and identify sound issues. For example, knowing how sound waves interact helps you place your studio equipment more effectively, reducing echoes and unwanted reflections. Using DIY techniques like creating makeshift diffusers or strategically placing furniture can break up sound waves and improve acoustics. These solutions don’t need costly studio equipment; instead, they rely on your creativity and understanding of sound behavior. Applying music theory principles helps you optimize your space without a professional overhaul. Understanding sound wave interactions allows you to predict and control how sound behaves in your room, leading to better acoustic treatment. Additionally, exploring concepts like sound healing science can inspire innovative ways to utilize sound vibrations for a more immersive listening environment. Being aware of pinball machine weights can also help you move and position equipment in your studio safely and efficiently. Incorporating principles of creative storytelling for branding can also help you craft an inspiring environment that motivates your creative process. Recognizing the importance of acoustic treatment can further refine your space for optimal sound quality. With small adjustments, you’ll notice clearer recordings, better sound balance, and an overall more professional studio environment.

8 Pack – Bass Traps Acoustic Foam Corner, 8''x8''x12'' Black Bass Traps Corner Studio Foam, High Density and Fire-Proof Acoustic Panels Recording Studio Acoustical Treatments
Acoustic Principle- Bass Trap is a kind of sound absorbing structure specially used to absorb specific low-frequency standing…
As an affiliate, we earn on qualifying purchases.
As an affiliate, we earn on qualifying purchases.
Which Household Items Are Best for Sound Absorption?

Soft fabrics and textiles like curtains, blankets, and carpets can effectively absorb sound and reduce echo in your studio. You can also create DIY sound absorbers using household items such as foam panels or thick quilts. These simple solutions make a noticeable difference without needing expensive equipment. Incorporating mindfulness practices can also help you stay focused and reduce stress while setting up your space. Using sound-absorbing household items strategically can further enhance the acoustic quality of your studio environment. Additionally, integrating acoustic treatments from anime films can inspire creative and effective ways to improve sound quality on a budget. Considering proper placement of acoustic panels can maximize their effectiveness and create a more balanced sound environment. Exploring free-floating design elements like lightweight partitions or hanging textiles can also help in managing sound reflections effectively.
Soft Fabrics and Textiles
Have you ever noticed how sound feels softer and more controlled when it bounces off certain household fabrics? That’s because textile textures and fabric patterns play a key role in absorbing sound waves. Thick, plush materials like velvet curtains, upholstered furniture, and heavy drapes are especially effective. These fabrics scatter and dampen sound, reducing echo and reverberation in your studio space. Opt for fabrics with varied textures—knobby, woven, or nubby surfaces—since they trap sound more efficiently than flat, slick materials. The pattern of the fabric can also influence absorption; densely woven or layered textiles work best. By strategically incorporating soft fabrics and textiles, you can create a warmer, more controlled sound environment without spending a fortune. Incorporating gelato flavors or other textured materials can also add visual warmth and character to your space while contributing to sound absorption. Additionally, understanding sound absorption principles can help you choose the most effective textiles for your specific studio needs. Using professional services for consultation might further optimize your acoustic treatment efforts. Exploring acoustic treatment options can provide additional guidance tailored to your space.
DIY Sound Absorbers
Many common household items can serve as effective DIY sound absorbers, helping to reduce echo and improve your studio’s acoustics without spending a lot. Using everyday objects as soundproofing materials or recording accessories is a budget-friendly way to enhance sound quality. Items like thick blankets, pillows, and curtains absorb sound waves and minimize reflections. Egg cartons, foam mats, or even dense bookshelves can help scatter sound energy. Here’s a quick guide:
| Household Item | Best Use | Effectiveness |
|---|---|---|
| Thick blankets | Cover walls, windows | High |
| Pillows | Place behind mics, on surfaces | Moderate |
| Egg cartons | Scatter sound, reduce echo | Low to Moderate |
| Carpet remnant | Cover floors, walls | High |
| Dense bookshelves | Create diffusers | Moderate to High |
In addition, sound absorption principles can help you select household items that are most effective for your space. Incorporating soundproofing techniques can significantly improve audio quality. Understanding the science of acoustics can guide you in optimizing your setup further. These DIY options are simple, affordable ways to improve your recording environment.

VEVOR Sound Dampening Blanket, 96" x 80", Extra Large Studio Grommeted Blanket with Grommets, Light Blocker for Door Acoustic Noise Blocking Blanket Studio Sound Absorption Sheet, Black
Wrap It Up in a Snap: Wrap it all up in our massive 96" x 80" sound dampening…
As an affiliate, we earn on qualifying purchases.
As an affiliate, we earn on qualifying purchases.
Where and How Should You Place Items to Reduce Echo and Reverb?
Placing sound-absorbing items strategically along your walls can make a big difference in reducing echo. Focus on corners and wall surfaces where sound tends to bounce most, and balance this with soft furniture or textiles. Adjusting item placement based on your room’s shape and materials helps create a clearer, more controlled sound environment. Additionally, incorporating outdoor cooling fans in specific areas can help manage airflow and dampen sound reflections, further improving acoustics. Using sound-absorbing materials such as foam panels or thick curtains can significantly enhance the effectiveness of your setup. For optimal results, consider cabling solutions that minimize vibrations and noise transmission from external equipment.
Strategic Wall Placement
Where should you position your sound-absorbing items along your walls to effectively reduce echo and reverb? Place soundproof curtains strategically across larger wall sections, especially where sound reflections are strongest. Hang these curtains at different heights to break up sound waves and prevent them from bouncing directly back. For bass traps, focus on wall corners where low-frequency build-up occurs—this is essential for controlling reverb. Proper bass trap placement helps absorb those deep sounds that cause muddiness. Keep in mind:
- Spread soundproof curtains evenly for balanced absorption
- Position bass traps in wall corners for maximum effect
- Avoid cluttering walls with too many items; focus on key areas
Strategic placement ensures your room sounds cleaner without the need for expensive treatments.
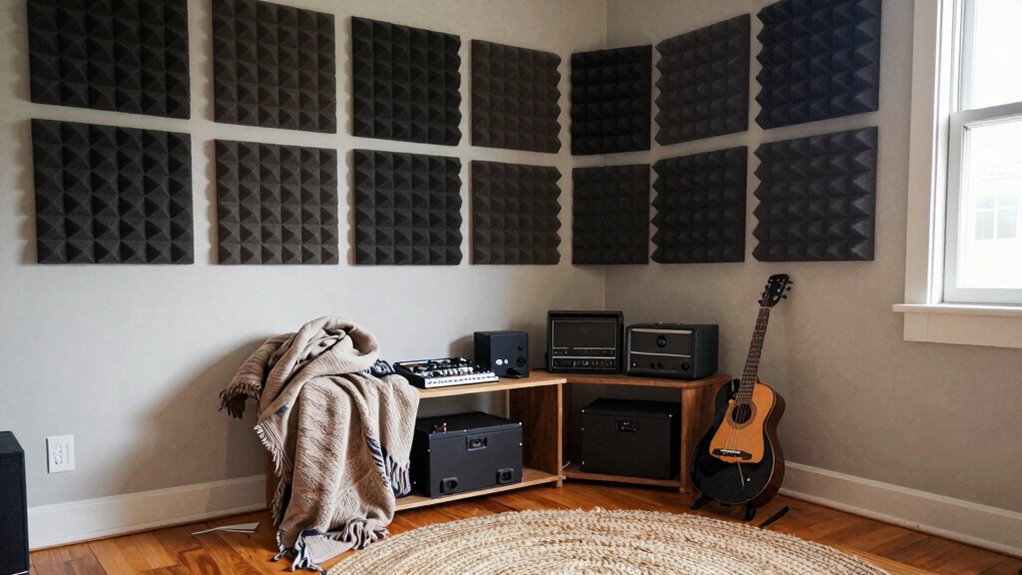
Optimal Room Corners
Have you considered how the corners of your room can be your best allies in reducing echo and reverb? Proper corner placement of acoustic treatments can notably improve your room’s acoustic balance. Placing bass traps or foam panels in the corners absorbs low-frequency build-up and minimizes sound reflections that cause echo. Focus on the vertical and horizontal corners where sound waves tend to gather and reflect. By strategically adding these items, you’ll create a more controlled environment, reducing reverb and making your recordings clearer. Remember, the goal is to balance sound absorption across the room, not deaden it entirely. With thoughtful corner placement, you’ll enhance your studio’s sound quality without the need for costly equipment.
Balance With Soft Items
After addressing the placement of acoustic treatments in the corners, the next step is to incorporate soft items throughout your room to further tame echo and reverb. Distributing plush, soft materials helps improve sound quality without sacrificing room aesthetics. You can add cozy rugs, fabric-covered furniture, or thick curtains, all of which are budget-friendly materials that absorb sound effectively. Strategically placing these items around your space can make a noticeable difference. Keep in mind that balance is key—avoid overcrowding, which can clutter your room. Instead, focus on soft items that complement your decor and enhance sound absorption simultaneously.
- Use rugs or carpets on the floor to reduce reflections
- Hang thick curtains or drapes over windows and walls
- Incorporate upholstered furniture or cushions
How to Personalize Your DIY Acoustic Treatments for the Best Results
Personalizing your DIY acoustic treatments guarantees they work best for your specific space and audio needs. Start with personalization techniques like adjusting placement or adding diffusers to target problem areas. DIY customization allows you to tailor treatments to your room’s unique acoustics, ensuring peak sound quality. Use different materials, such as foam panels, fabric-wrapped boards, or even household items like rugs and curtains, to fine-tune absorption and diffusion. Experiment with positioning to find the sweet spot where sound clarity improves without deadening the space. Keep in mind that small adjustments can make a significant difference. By actively customizing your treatments, you’ll create a more balanced, professional-sounding environment that’s perfectly suited to your recording or mixing goals.
Tips to Maintain and Enhance Your Home Studio’s Sound Over Time
Maintaining the quality of your home studio’s sound requires ongoing attention and small adjustments over time. Regularly evaluate your soundproofing techniques to identify areas where noise leaks or reflections occur. Upgrading equipment, like microphones, monitors, or acoustic panels, can notably improve sound clarity and fidelity. Keep your space organized to prevent clutter from affecting sound absorption. Additionally, periodically test your setup by recording and listening critically, then make targeted adjustments. Consider these tips:
- Reassess and improve soundproofing techniques as your needs evolve
- Invest in equipment upgrades to stay current with technology
- Regularly clean and position acoustic treatments for peak performance
These small, consistent efforts help maintain and enhance your home studio’s sound over the long term.
Frequently Asked Questions
Can DIY Acoustic Treatments Match Professional Studio Standards?
Diy acoustic treatments can come close to professional studio standards if you carefully apply soundproofing methods and focus on acoustic panel design. You’ll want to choose the right materials, like foam or mineral wool, and properly position panels to absorb and diffuse sound effectively. With patience and attention to detail, you can considerably improve your room’s acoustics, making your home studio sound much more professional without the high costs.
How Often Should I Update or Replace My DIY Sound Treatments?
You should consider updating or replacing your DIY sound treatments every 1 to 3 years, depending on treatment longevity and how well they maintain their effectiveness. Regular DIY upgrades, like repositioning panels or adding new materials, can keep your studio acoustics ideal. Keep an eye on dust buildup or material wear, and if you notice sound quality diminishing, it’s time for an upgrade to maintain professional-grade acoustics.
Are There Specific Materials to Avoid for Home Studio Acoustic Solutions?
Avoid material pitfalls like overly reflective or dense materials that can worsen sound issues. Stick to proven options like foam panels, bass traps, or mineral wool. Be wary of acoustic myths suggesting random household items can replace proper treatments—they often don’t work. Materials like carpets or blankets may help temporarily but won’t provide the balanced sound you need. Choose purpose-built acoustic solutions for reliable, cost-effective results.
How Can I Measure the Effectiveness of My DIY Acoustic Treatments?
Think of your room as a mirror reflecting sound; to measure your DIY treatments’ effectiveness, use a sound level meter or room analysis software. Focus on room dimensions and sound reflection, noting improvements in reducing echo and unwanted reverberations. By comparing measurements before and after treatments, you’ll see how well your acoustic adjustments work, helping you fine-tune your setup for clearer, more accurate sound.
What Are Cost-Effective Ways to Improve Soundproofing Alongside Absorption?
To improve soundproofing and absorption cost-effectively, focus on enhancing noise isolation with thick, dense materials like mass-loaded vinyl or layered drywall. Use durable, lightweight barriers such as resilient channels to prevent vibrations. Seal gaps around doors and windows with weatherstripping or acoustic caulk. These steps boost material durability and noise control without breaking the bank, creating a more professional sound environment in your home studio.
Conclusion
By using everyday household items creatively, you can considerably improve your home studio’s sound quality without breaking the bank. Studies show that proper acoustic treatment can reduce echo and reverb by up to 50%, making your recordings clearer and more professional. With a few simple tweaks and personalized adjustments, you’ll enjoy a more accurate listening environment that boosts both your confidence and creativity. Start experimenting today — great sound doesn’t have to come with a hefty price tag.